Today, monitoring a renewable energy system is essential. The Studer monitoring provide continuous information (real-time and past behaviour) for a deep understanding of the operation of the system. Having the right information at hand facilitates the follow up of the main performance indicators as well as remote diagnostics and problem anticipation.
There are three kinds of monitoring and control in the Studer environment:
- Local monitoring and control: this is done with the nx interface and the daily storage of data on the usb key. At any moment all the data can be retrieved on the usb key and analysed locally on a computer, even in remote area without internet. An local web interface is available at the adress
- Remote monitoring and control via Internet is possible with two options:
-
- for professionals and advanced users – Studer Portal is a web site with multiple functionalities (visualization, graphs, email alerts, download of data, ...). Connect your nx-interface to the internet to get all the advantages of the Studer Portal available here: https://portal.studer-innotec.com.
- for end-users – Studer Easy Monitoring App is a simple and intuitive way to see the status of the system and its history. It is available in IOs and Android. The Easy Monitoring APP uses the webportal as backend and accounts must be created on the portal to use the APP.
- for professionals and advanced users – Studer Portal is a web site with multiple functionalities (visualization, graphs, email alerts, download of data, ...). Connect your nx-interface to the internet to get all the advantages of the Studer Portal available here: https://portal.studer-innotec.com.
- Own monitoring: the user can develop its own monitoring and control of a next system with the use of MODBUS communication. Modbus RTU and TCP are supported. RTU with RS485 connection and TCP with the Ethernet connections, both situated on the nx-interface.
On the nx-interface all settings necessary for the monitoring are managed in the Monitoring menus. On the main screen, the state of the different aspects of monitoring can be checked quickly:
- Is there space left for datalogging on the usb key?
-
- Eject to take the key away to copy data on a computer
- Is internet connected?
-
- View the connection status and setup the wifi connexion
- Is the studer webportal connected and operational?
-
- Set up the pairing with the portal with the GUID number.
- Modbus
-
- Enable modbus communication (disabled by default)
- Enable modbus communication (disabled by default)

Local monitoring
A record of all electrical values is done in nx-interface but also in the next3 devices themselves. In all cases, the usb key on nx-interface is the way to take the data out of the system.
The USB memory is used for a periodical backup of monitoring data. A daily .csv files is copied automatically as soon as an USB memory stick is plugged on the nx-interface and has sufficient storage space left. The daily files contain all the data recorded with 1min/1hour/1day/1month rate, and the day notifications.
There is no limit for the USB key capacity, however the USB key must have a valid FAT32 partition where the data will be saved. For a 32 GB partition on USB key, and same installation as described hereabove, the partition can hold more than 10 years of data. When the USB key is full, a message is shown on the nx-interface.
The internal memory of the next3 is limited and stores the data for a limited timeframe. The quantity of log data that can be stored in a next3 device depends on the type of next3 device (-s, -t, -st, ...). Here is an indication of the data that can be stored in the next3:
- 1min data: at least the last 3.5 days of data (nx3 with full options), up to the last 50 days (nx3 inverter only).
- 1hour data: at least the last 50 days of data, up to the last 3 years
- 1day data: at least the last year of data, up to the last 15 years
- 1month data: at least the last 26 years of data
- List of notifications: 130’000 last notifications (~15 years if 1 notification/hour)
In the nx-interface, the quantity of data that can be stored depends on several factors:
- Installation configuration, number of devices
- Other data saved in nx-interface internal memory, e.g. datalog from previously connected installations.
Here is an indication of the data that can be stored in the nx-interface, assuming there is only one installation datalog in internal memory, and this installation has only one next3 device:
- 1min data: last 200 days of data
- 1hour data: last 6 years of data
- 1day data: at least the last 10 years of data
- 1month data: at least the last 10 years of data
- List of notifications: at least the last 10 years of data
The memory for each type of data is managed with a first-in first-out strategy: when the memory is full, the oldest data are overwritten.
If a new USB key is plugged in the nx-interface, it is possible export the monitoring data recorded internally. This is performed in the “manage datalog” app.
As the transfer can take a long time, the menu allows you to choose what is transferred.

When removing the USB storage, always wait for the end of the data transfer and use the “eject” button for a proper end of operation.
Set up of the internet connection
The connection can be done with
- A connection with an LAN cable as described in the wiring chapter. If Internet is available at your router, there is no special configuration to do.

- An wifi connection that can be selected in the second page of the internet connection configuration. Scan the available wifi, select one and enter your password.
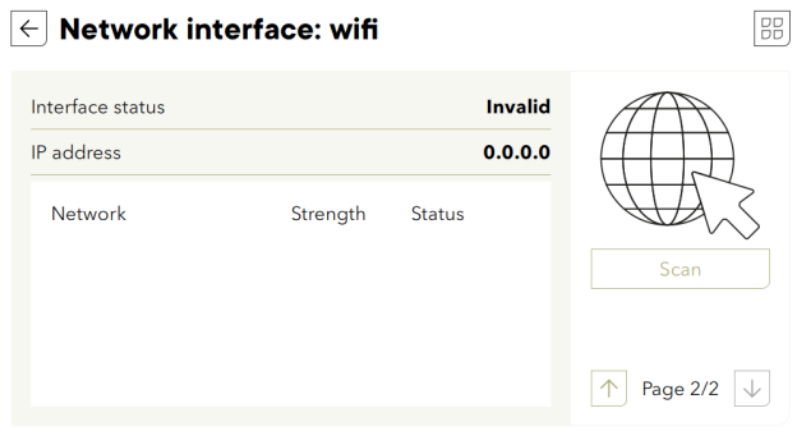
The wifi connection requires the usb-wifi stick provided by Studer. Don’t use any other stick as there are drivers necessary and there is a high probability that it will not work.

Remote monitoring
The remote monitoring is done via the Studer Monitoring Portal: https://portal.studer-innotec.com
To connect an installation on the web portal, you’ll need a to perform a pairing, which means you have to identify an installation and make the link to your portal account. This is none with a unique identification number called GUID that is entered on both side of the communication channel: in the next3 and in the web portal:

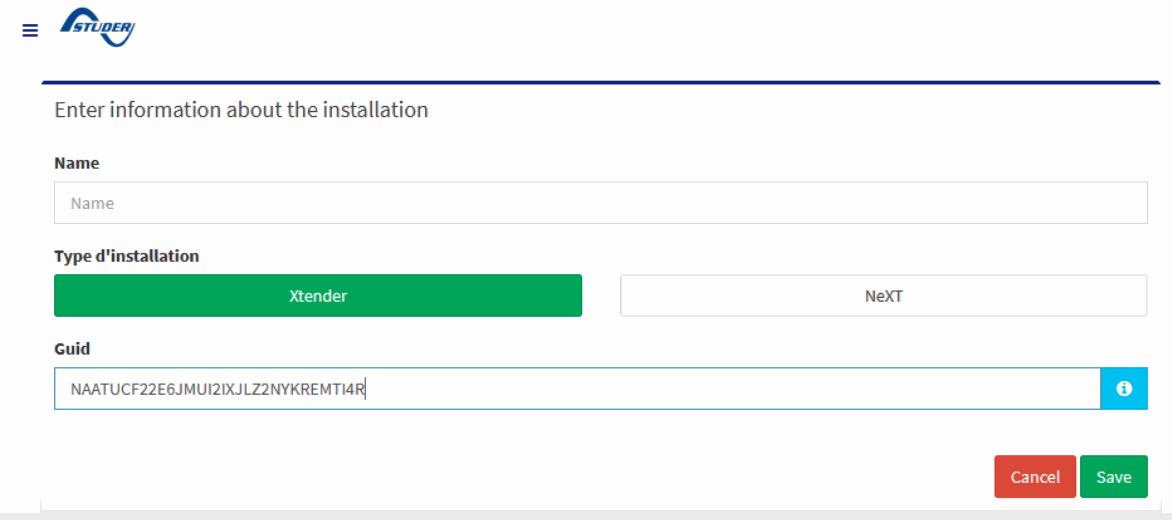
Never give the same GUID two times to two different installations. In case of doubt, use the automatic GUID generation.
If a proper GUID is entered, the webportal info will be “connected and paired”.
When all the csv files are transferred to the webportal, the datalog synch info will be “synchronised”.
Scada monitoring
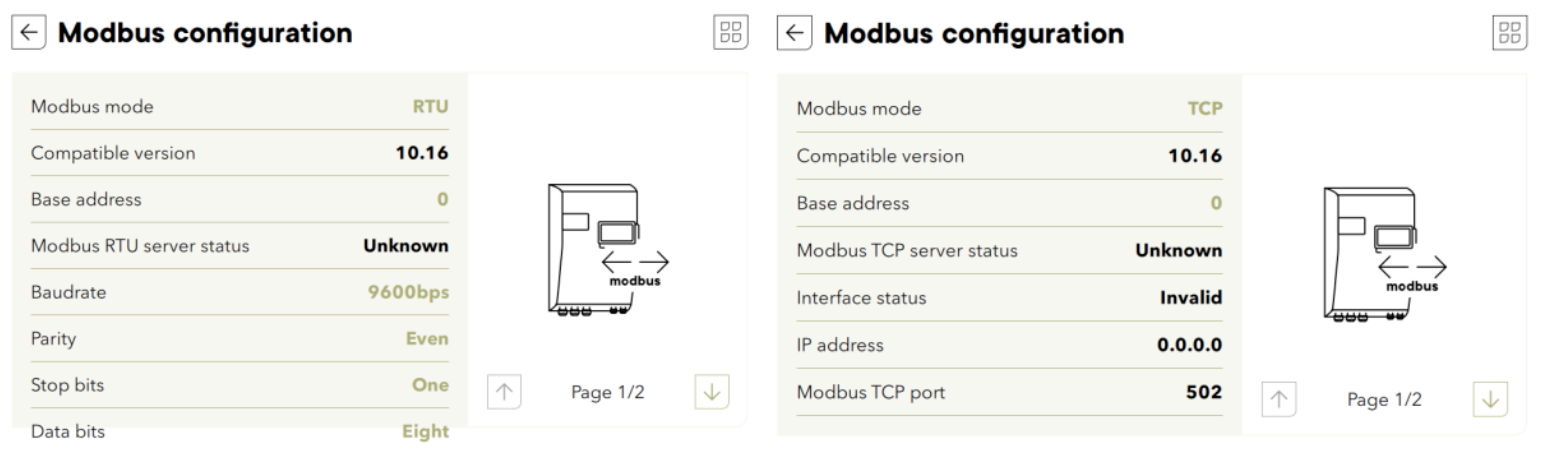
The user can develop its own monitoring and control of a next system with the use of MODBUS communication. Modbus RTU and TCP are supported. RTU with RS485 connection and TCP with the Ethernet connections, both situated on the nx-interface.

Only one Modbus mode at a time can be used. It is not possible to use RTU and TCP at the same time.
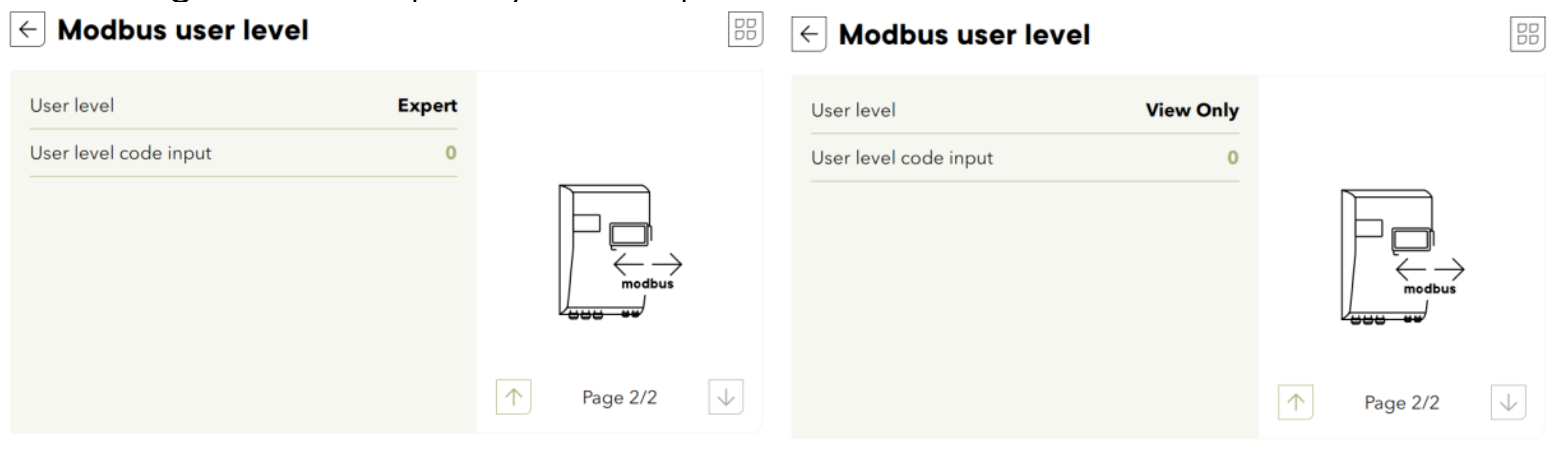
For security reasons, the Modbus is deactivated by default and there is a specific user level for the Modbus communication to limit the access through this channel. Per example use the View only to block all changes and accept only read requests.
The Modbus specification with the registers list is given in a dedicated document for developers. More information on the Modbus application note. Code examples is available on Studer GitHub: https://github.com/studer-innotec/next-modbus