Initial configuration
A next3 installation requires an initial configuration with the wizard. This must be done with the nx-interface. Be sure to have it on your installation for the first commissioning.
The next3 will not start its operation without this first configuration.
Front panel button
In the middle of the front panel, the ne[xt] part is a button with the following functions available depending on how long the button is pressed:
- Impulse push: clear error(s), stop beeping
- Short: 1 second < press < 3 seconds: ON/OFF of next3 and all its functions. Signalled by one beep after 1 second
- Long:3 seconds < press < 10 seconds: the button has no effect when you release it, this is for the case when you pressed long by mistake. Signalled by two beeps after 3 seconds
- Longer: press >10 seconds: all devices are reset. Signalled by 5 beeps after 10 seconds.
You can hear a beep after ~1sec, ~3sec and ~10sec and you can release the button to achieve the associated function at that moment. The front panel button can be deactivated/activated via the nx-interface (but it’s not advised).
To power ON the next3 and all its functions: push the front panel button until you hear the first beep (or use the ON/OFF button of the nx-interface). After this, your next3 installation is in the following state (please note that it takes ~5sec to start all converters):
- The next3 inverter is ON.
- The “!” red LED is permanently off, because the next3 is now ON
- The battery is connected (battery symbol is light on)
- The voltage is provided to Ac-Loads (house symbol is light on)
- The solar chargers are enabled (PV array symbol is light on if the solar chargers are working,
or blinks once if the solar chargers are not working because there is no sun) - The connection to Ac Source is enabled (grid/genset symbol is light off or light on depending
on your configuration) - The AC Flex is enabled (grid/genset and house symbols are light off or light on depending on
your configuration)
Your installation is now in operation!
If the system requires configuration or setting modifications, carry them out immediately. These must be modified by means of the remote control nx-interface.
Please note that powering from the grid without battery is not possible. The next3 system cannot operate as a PV inverter without storage. If there is no battery connected, the next3 will not start and shows no indications.
Front panel led indicator
The front panel has the necessary information to understand the state of the next3 with the LED lights.
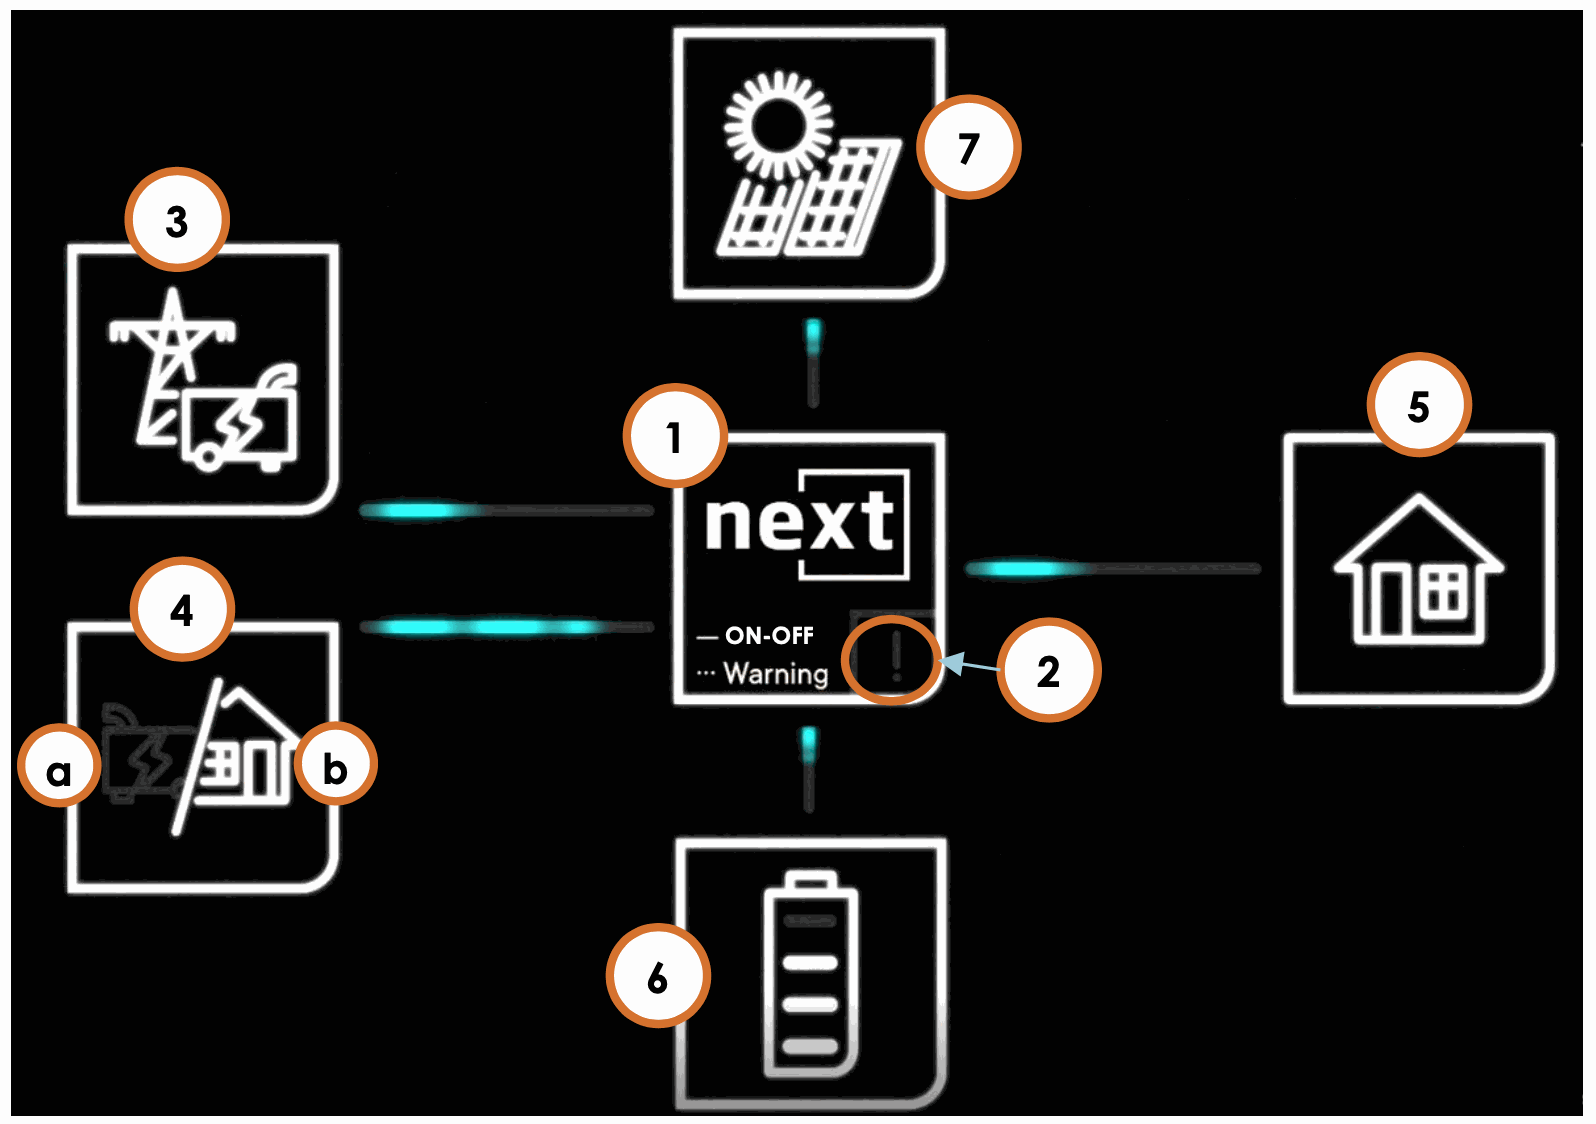
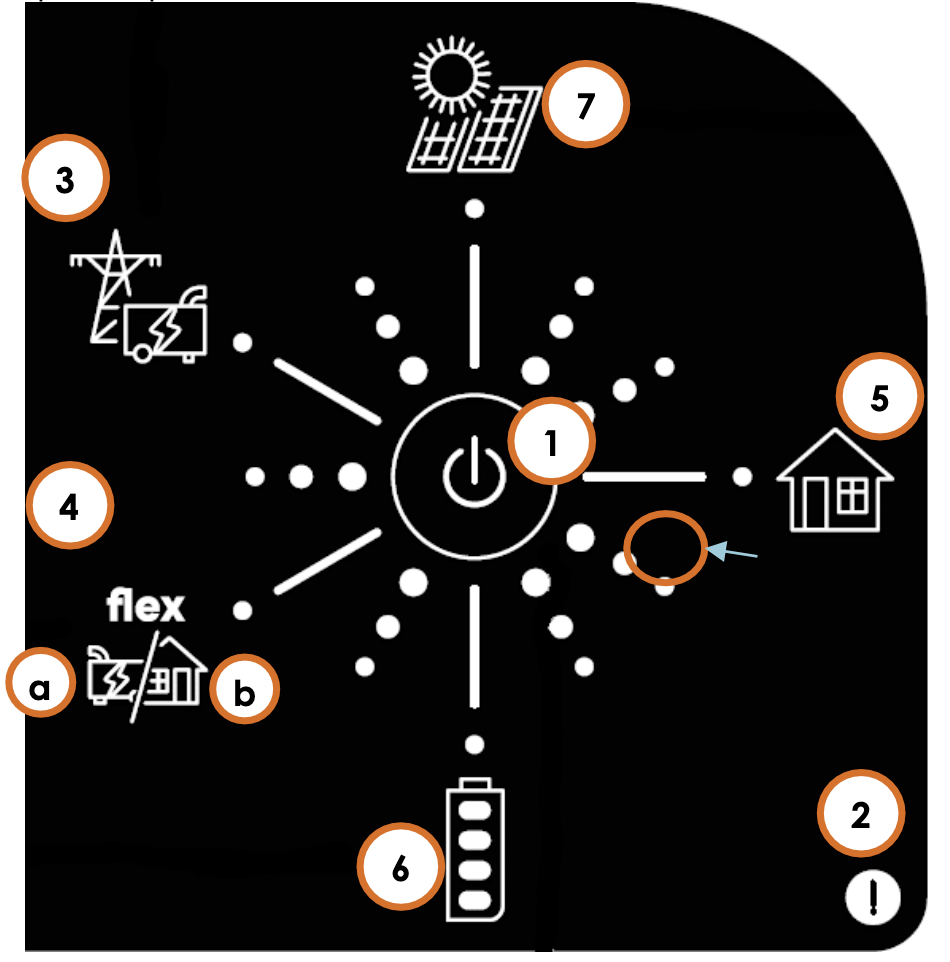
The rack version front panel presents a different look with the same functions:
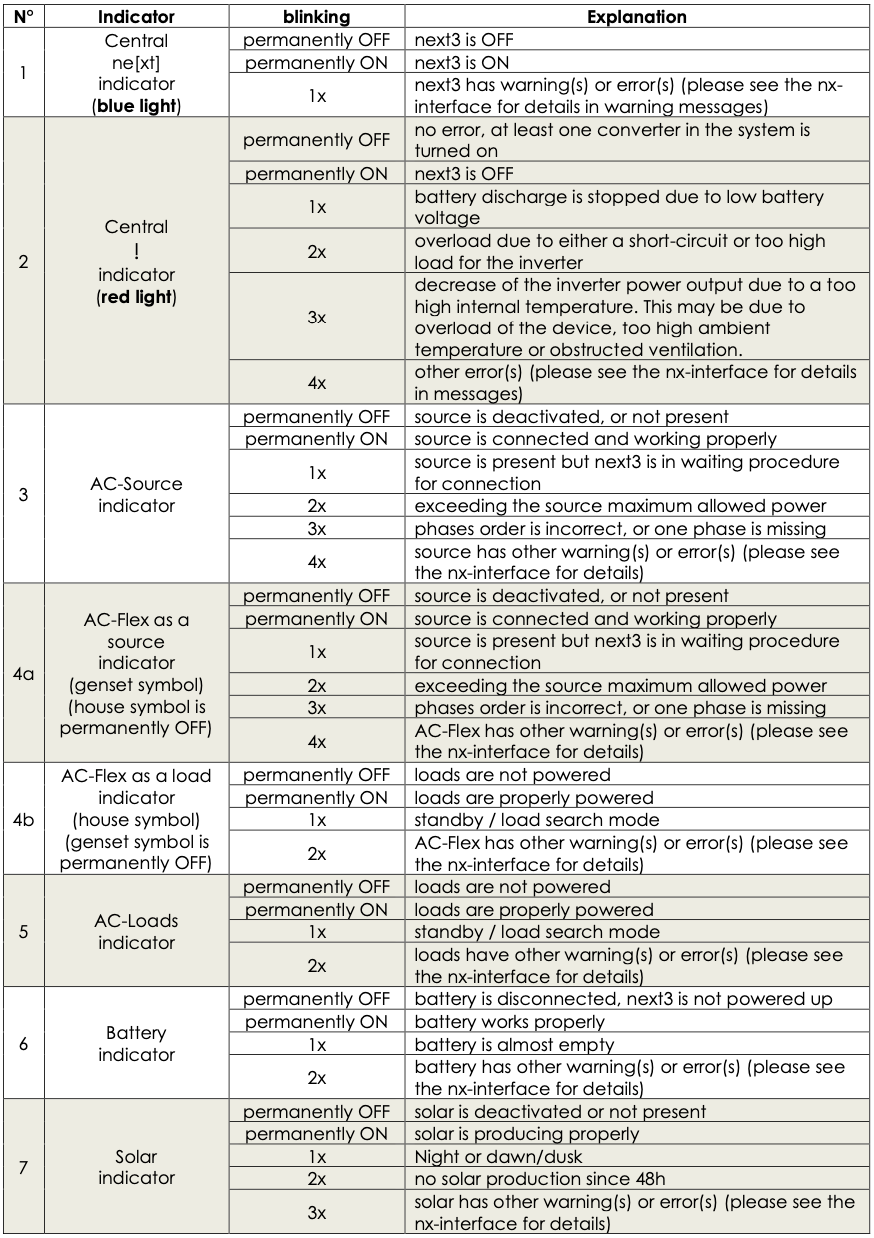
The table hereunder describes the information or type of error according to the number of times an indicator flashes.
State of charge indicator: 4 bars in the battery symbol:
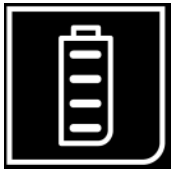
- 75 to 100%
- 50 to 75 %
- 25 to 50%
- 0 to 25 %
In charge mode, the upper LED line inside the battery blinks indicating the charge phase:
- 1 time: bulk
- 2 times: absorption
- 3 times: equalization
- permanently on: floating
For lithium batteries with BMS, the upper line never blinks as there are no charging phase controlled
by the next3. The charge is controlled by the BMS.
Special cases:
- If there is absolutely no light on any of the LEDs, the next is completely without power (battery
disconnected) or there is a problem with the display of LEDs. - When powering up the next3 with the battery, all LEDs blink once during the start check.
- All LEDs can blink at the same time in an identification procedure (with nx-interface). It is
possible to identify the devices in multi-unit system that way: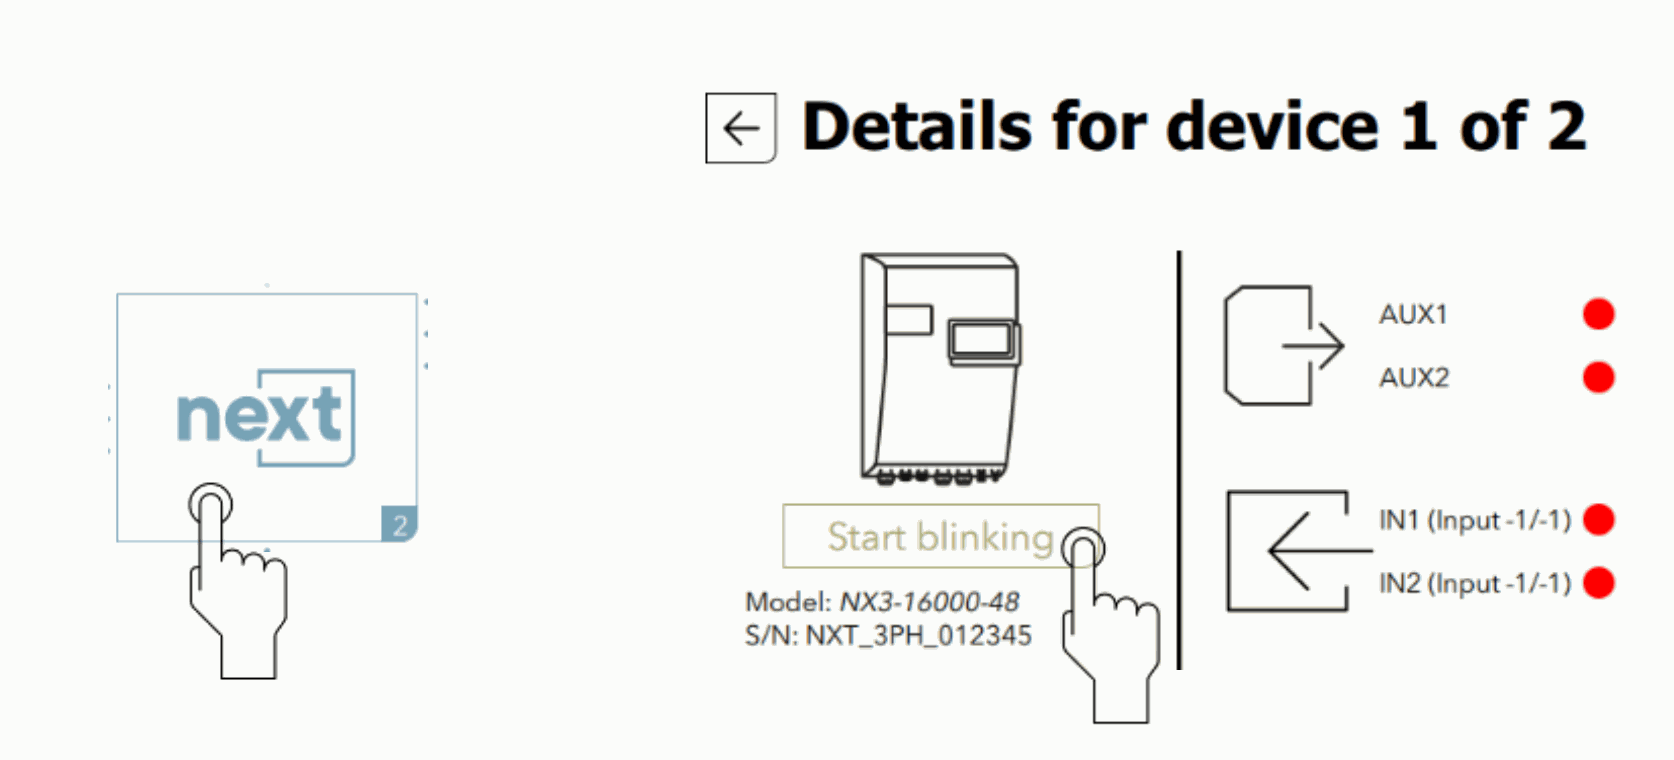
Beep indicator (buzzer)
The sound produced by the next3 buzzer uses the same beep sequence as the central “!” red light flashing sequence.
This buzzer can be deactivated/activated with the nx-interface.

This buzzer can also be deactivated/activated with the next button of the front panel. The button must be pushed for 5 seconds < push < 7 seconds (release after the 3rd beep to toggle the function). In any case, the sounds when pressing the button to identify the functions described on the front panel button section remain active.